Microsoft Entra ID – Enabling Custom Security Attributes

Microsoft Entra ID allows adding business specific properties on User and Service Principle objects. This capability is slightly different from the Extensions feature that allows extending Entra ID resources.

The key difference between Extensions and Custom Security Attributes, as the latter’s name implies, supports restricting Read/Write access to these attributes using RBAC and Permissions.

These attributes are intended to store sensitive information that can only be accessed or edited by users with appropriate permissions or roles. Another use case can be to tailor access control. For instance, Hospitals and Healthcare facilities can define custom security attributes such as “Patient Records Access” and “Pharmaceutical Inventory Access” and assign these attributes to appropriate users.

While granting access to Applications, admins can then configure RBAC to provide access to Doctors, Nurses and Administrative Staff to only access the data and system relevant to their roles. A doctor can have access to patient records, while an IT technician has access to the hospital’s network infrastructure.

Enabling Custom Security Attributes

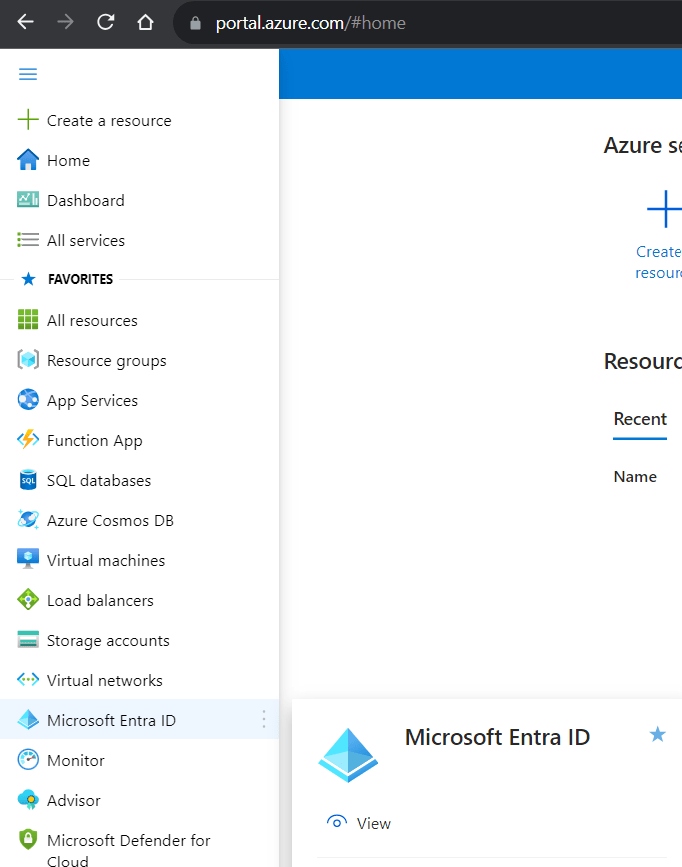
After logging into the Azure Portal, navigate to the “Microsoft Entra ID” application.

Click the “Custom Security Attributes” link on the left pane. You will notice the “Add Attribute Set” button is disabled.

Two separate Roles “Attribute Definition Administrator” and “Attribute Assignment Administrator” need to be configured for setting up Custom Attributes Creation and Assignment access respectively.

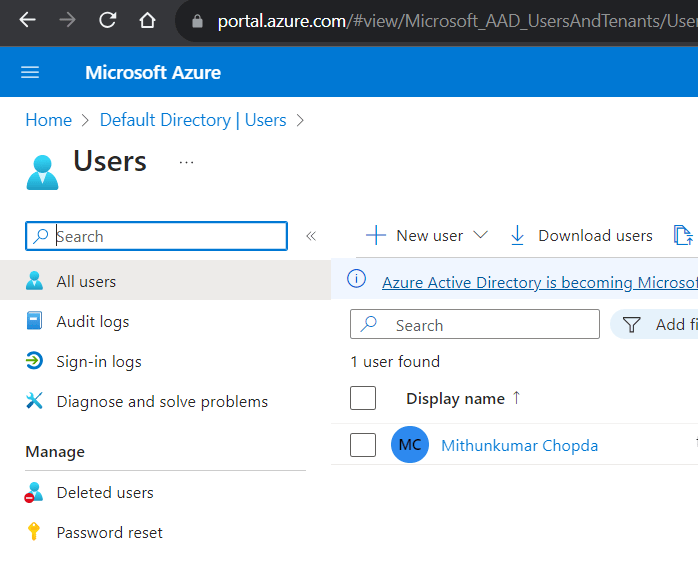
Navigate to the Users page by clicking “Users” under the Manage section on left pane. Find the user whom you wish to allow Creating Custom Attributes. Click on the Display name to assign roles.

Click the “Assigned roles” link on the left pane. Click the “Add assignments” button on the toolbar.

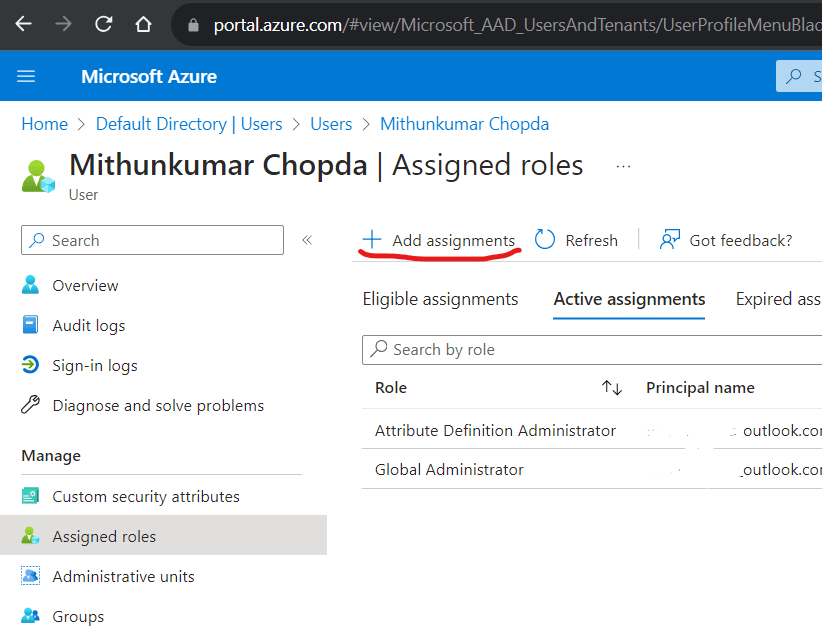
Search for “Attribute Definition Administrator” role and follow the wizard to complete the assignment. Be sure to mark the role assignment as “Active” instead of “Eligible”.

Repeat this step for assigning the “Attribute Assignment Administrator” role either to same user or another user.

Now, head to the “Custom Security Attributes” blade on the left pane on the Microsoft Entra ID application page. You should see the “Add attribute set” button enabled on the toolbar.

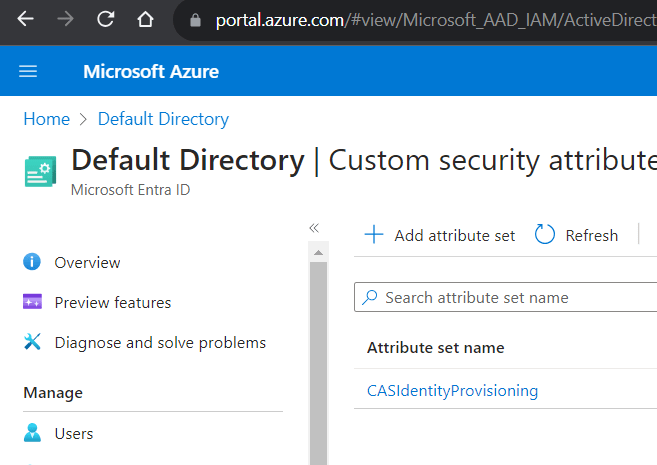
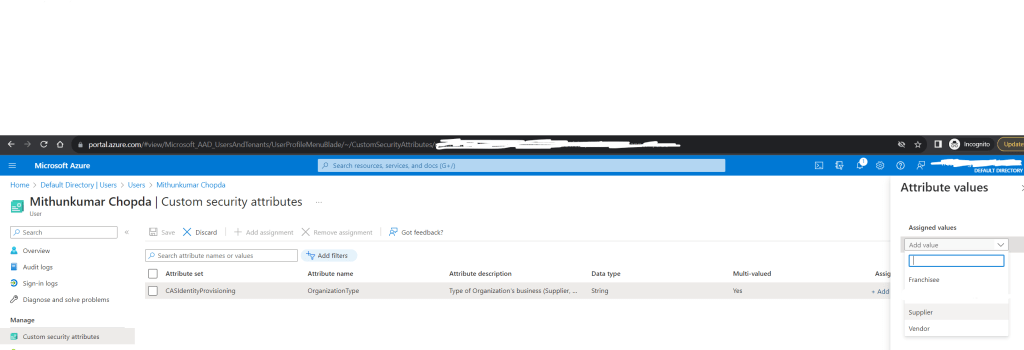
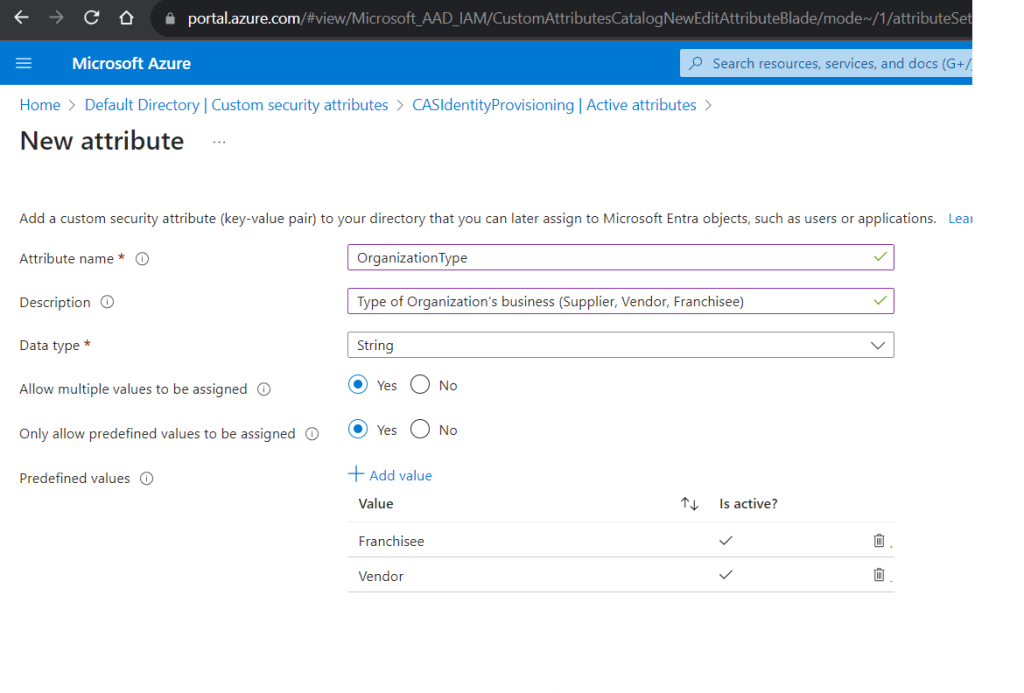
An Attribute Set is required for grouping the custom attributes and needs to be created before creating Custom Attributes. Once an Attribute Set is created, add new attributes to the Set.

Once the Attributes are created, head back to the Users page, search the user, click the “Display name”. Click the “Custom security attributes” blade on the left pane. Click “Add assignment” button on the toolbar to select the custom attribute you just created and assign a value.

Azure Active Directory B2B

Azure Active Directory B2B (Business-to-Business) is a feature that extends the capabilities of Azure AD to allow collaboration between organizations. It simplifies the process of sharing resources with external users while maintaining security and compliance. In this blog post, we will delve into the key concepts of Azure AD B2B, helping you understand its importance and how to leverage it effectively.

What is Azure Active Directory B2B?

Azure Active Directory B2B is a service provided by Microsoft that enables organizations to collaborate with external partners, customers, or suppliers securely. It allows these external users to access company resources and applications without the need for them to have a dedicated Azure AD account. Instead, they can use their own work or social identity to gain access.

Key Concepts:

1. Guest Users: In the context of Azure AD B2B, external users are referred to as “Guest Users.” These users are invited to collaborate with your organization. Guest users can be individuals with email addresses from other domains, making it easy to collaborate across organizations.

2. Invitations: Invitations are the foundation of Azure AD B2B. Organizations send invitations to external users, allowing them access to specific resources or applications. These invitations are secure and can be managed and monitored within Azure AD.

3. Collaboration Scenarios: Azure AD B2B supports various collaboration scenarios, such as sharing documents in SharePoint, collaborating in Microsoft Teams, or accessing applications like Azure DevOps. Organizations can choose the level of access and permissions for guest users in these scenarios.

4. Security and Conditional Access: Security is paramount in B2B collaborations. Conditional Access Policies in Azure AD B2B allow organizations to enforce security requirements, such as multi-factor authentication (MFA), based on user attributes and behavior. This ensures that guest users meet security standards.

5. Self-Service Sign-Up: Azure AD B2B offers self-service sign-up, allowing external users to accept invitations and create their own guest accounts. This simplifies the onboarding process and reduces administrative overhead.

6. Azure AD B2B vs. Azure AD B2C: It’s essential to distinguish between Azure AD B2B and Azure AD B2C. B2B focuses on collaborating with external organizations, while B2C is designed for consumer identity and access management.

Benefits of Azure AD B2B:

Simplified Collaboration: B2B makes it easy to collaborate with partners and customers, enhancing productivity and communication.-

Enhanced Security: With Conditional Access Policies and Identity Protection service, organizations can secure their resources even when accessed by Guest Users.

Scalability: Azure AD B2B scales effortlessly to accommodate growing collaboration needs.

Audit and Monitoring: Azure AD provides detailed audit logs, allowing organizations to monitor guest user activity and maintain compliance.

Conclusion: Azure Active Directory B2B is a crucial tool for modern organizations seeking secure and efficient collaboration with external partners. By understanding these key concepts and leveraging the capabilities of Azure AD B2B, organizations can foster productive collaborations while maintaining the highest standards of security and compliance.In upcoming posts, we will dive deeper into specific use cases and best practices for implementing Azure AD B2B effectively in your organization. Stay tuned!

Deserialize XML Namespaces

When deserializing XML document using the System.Xml.Serialization.XmlSerializer, the XML Namespaces Attribute(s) cannot be hydrated using XmlAttribute attribute.

There is a designated class XmlSerializerNamespaces that needs to be used. Without this, you would be required to populate the Namespaces by querying them using XML Parser and Linq.

The way to allow the deserializer to hydrate all Namespaces including prefixes is to add a property named xmlns of Type XmlSerializerNamespaces to your class and decorate this property with XmlNamespaceDeclarations attribute.

Deserializing the XML with the XmlSerializer.Deserialize() will correctly load a list of all Namespaces with prefixes defined in the XML document.

The XmlSerializerNamespaces contains a Dictionary of XmlQualifiedName named Namespaces that contains a list of Name and Namespace as key value pair. The value of Name for default xmlns is Empty but the Namespace will contain the defined value. If your XML document contains xmlns with prefix, the prefix is loaded into the Name property.

Applying a Microservice Architecture to Enterprise Applications – Part 2

We discussed in the previous post that intra-microservice communication should not be triggered using nested requests. Such approach can lead to a complex tree of blocking calls thereby degrading the request latency.

Updates should not be requested immediately but rather be pushed whenever state changes happen. This kind of communication should be asynchronous to be able to achieve better performance. A synchronous call that places the Update request in a queue and immediately returns an “accepted” result instead of waiting for the actual update to be performed helps achieve low latency and high throughput. Since the requests complete faster, threads free up faster and more threads remain available to accept new requests.

Publisher/Subscriber aka Pub/Sub pattern can be used to achieve asynchronous communication between microservices.

In Pub/Sub pattern, the publishers and subscribers are not known to each other. They need not know each other. Communication happens by publishing messages to a Queue. The Subscribers listen to the Queue for messages of their interest. Since the sender of the message and listener of the message do not talk to each other but to a broker that manages the Queue, it increases microservice independence. Here the broker takes care of queueing, dequeuing and distributing the messages to Subscribers.

Http Polling pattern is another pattern that can be used to achieve asynchronous communication between presentation/client side microservice and backend microservices. Polling is useful to client side code as it can be hard to use long running connections.

Client application makes a synchronous call to a backend microservice – typically an API, triggering a long running operation on the backend. The API responds synchronously as quick as possible with “accepted” status and a reference endpoint – status endpoint that the client can poll to check for the result of the operation.

The API queues the request to a Queue for further processing. While the work is pending, the status endpoint when polled returns HTTP 202 status. Once the work is completed, the status endpoint when polled returns the result.

Eventual Consistency pattern can be used to achieve data independence. When a microservices needs data that’s originally owned by other microservices, instead of making asynchronous requests to other microservices to fetch the required data, each microservice should store a copy of data that it requires.

When a microservice that owns the data, updates the state data it manages, it should notify other microservices so that they can update their copy of data. This pattern is called Eventual Consistency because when a data changes in one microservice, other microservice eventually sync the state of their copy of data in a disconnected manner.

Duplicating data across multiple microservices is NOT an incorrect design. It instead allows translating the data into terms specific to each bounded content. For example, an application may have “Identity-API” that is responsible for managing user’s data with an entity named “User”. However, when the “Ordering” microservice wants to store user’s information, it will want it as a different entity called “Customer”. The Customer entity shares the same identity with the original User entity, but it might have only a few attributes needed by the Ordering domain.

A communication mechanism is required to communicate the updates happening between microservices boundaries. This is achieved using Integration Events using a message broker or HTTP polling. The approach depends on the domain complexity and the desired scalability of the microservice.

The patterns discussed above are best practices for implementing loosely coupled, highly autonomous and performant microservices. There are other communication patterns such as Request/Response pattern, Service aggregator pattern, Service mesh pattern etc. However, they all are fundamentally a form of synchronous or asynchronous communication patterns and are used for organizing the communication and the handling cross cutting concerns involved in it.

In the next post, we will discuss the tools and technologies needed for implementing asynchronous communication while developing microservices. Our choice of platform will be .NET Core 5.0 and Azure Cloud Services. In future, we will also cover patterns for implementing Resiliency. But before that, lets get into code and implement a simple microservice that incorporates the above aspects of loose coupling and data independence.

Applying a Microservice Architecture to Enterprise Applications – Part 1

This post describes highly scalable architectures based on small modules aka “microservices”. The microservices architecture allows for fine-grained scaling of operations where every single module can be scaled as required without it affecting the remainder of the system. It allows for better Continuous Integration/Continuous Deployment by allowing every part of the system to evolve and be deployed independently.

Microservices are more than scalable components. They are building blocks that can be developed, maintained and hosted independent of each other. Splitting development, deployment, and maintenance improves the system’s overall CI/CD cycle.

Independence and fine-grained scalability are in the very nature of microservices. This leads to following principles.

Independence of design choices: The design of one microservice must not depend on the design choices that were made in the implementation of other microservices. This gives us liberty to use technologies that are best fit to solve the technical challenges specific to each microservice.

A consequence to this principle is that different microservices cannot connect to same shared storage since sharing the same storage also means sharing all the design choices that determined the structure of the storage subsystem. Thus, either a microservice has its own data storage or it has no storage at all. In the later case, it has to communicate with other microservices that take care of data storage.

This doesn’t mean that every microservice microservice would always have a dedicated storage. Some complex domains can have a microservice (logical microservice) made up of multiple microservices (physical microservices). Multiple physical microservices may access the same database that serves the logical microservice.

Independence from deployment environment: Microservices are scaled out on different hardware nodes and different microservices can be hosted on the same node. Therefore less a microservice relied on the operating system and other software, more available hardware nodes it be deployed on. This is the reason microservices are usually containerized. Containerization allows each microservice to bring its dependencies along so that it can run anywhere.

Loose Coupling: Each microservice must be loosely coupled from other microservices. This also means that each microservice must be able to perform its operations independently and should not introduce “chatty communication” with other microservices.

No Recursive Request/Responses: Microservices must not cause recursive chain of nested request/responses to other microservices. Nested requests can degrade response time. Usually, nested requests are signs on interdependency. Such interdependency can be avoided if each microservice stores all the data that it needs to ensure fast responses. To keep their data up to date for incoming requests, microservices must communicate their data changes as soon as they occur with microservice. This is generally achieved through asynchronous messages since synchronous nested messages can cause thread starvation and degrade responses.

Resiliency: Fine-grained scaling of distributed microservices that communicate with each other through asynchronous communication requires each microservice to be resilient. Communication initiated by or directed to specific microservice may fail due to transient errors or network failures. Such failures can be temporary or persistent in nature. Temporary failures can be handled with appropriate retry mechanisms. Retries in case of persistent failures, retries can cause an explosion of retry operations leading to saturation of server resources. This requires retry with back-off strategies to ensure that failures to one system do not propagate to other systems also called as – congestion propagation.

The preceding principles and constraints are best practices for building enterprise applications using microservices based architecture.

In the next post, we will discuss more on patterns and practices for avoiding recursive request/responses and implementing resiliency in enterprise applications.